· Lawn Mower Maintenance · 24 min read
Husqvarna Self Propelled Not Working 2
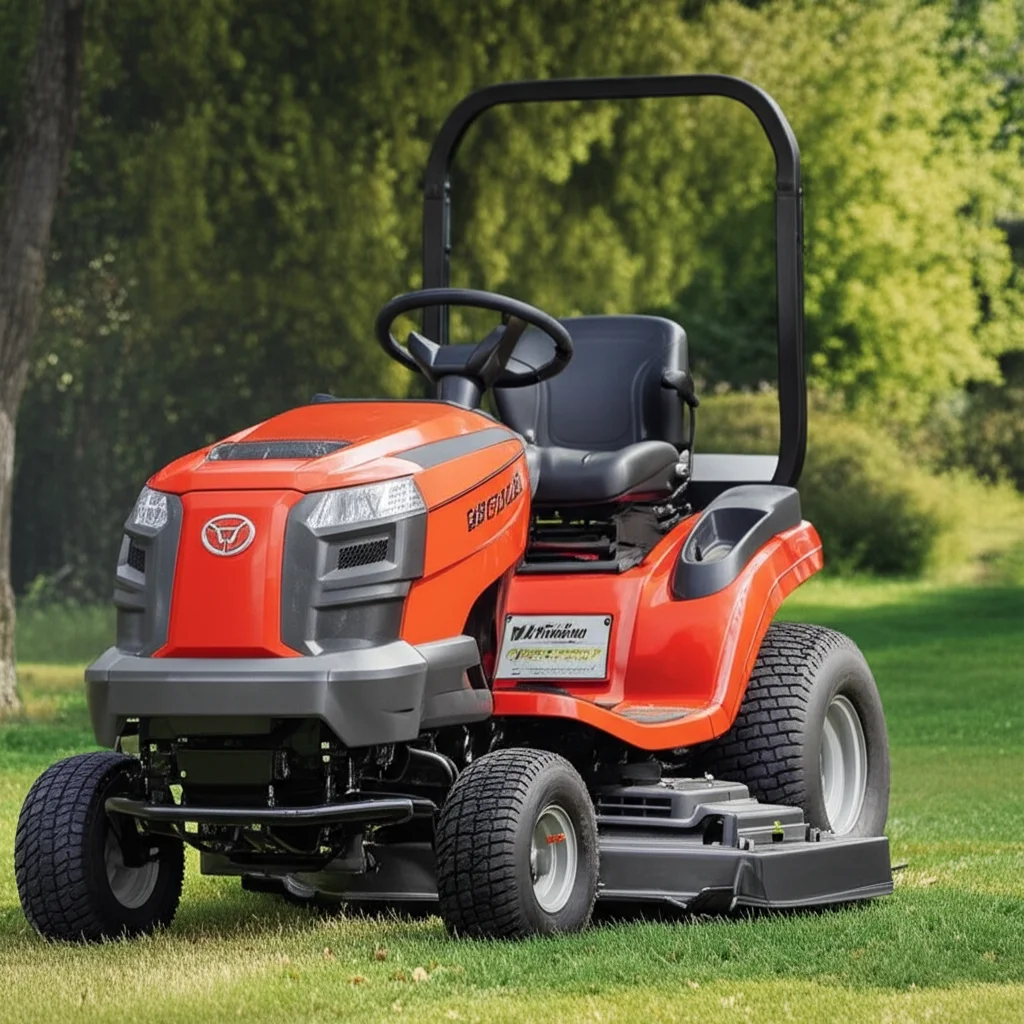
Husqvarna Self Propelled Not Working? Let’s Get Rolling!
Is your Husqvarna self-propelled lawn mower stubbornly refusing to move forward? Don’t worry, you’re not alone! Many homeowners experience issues with the self-propel system, and often, the fix is simpler than you think. This article builds on basic troubleshooting, offering a more in-depth look at diagnosing and resolving the problem with your Husqvarna mower. We’ll cover everything from drive belts to transmission issues, helping you get back to enjoying a perfectly manicured lawn. We’ll explore common causes and provide step-by-step instructions to get your mower moving again.
Takeaway:
- Check the drive belt for wear or breakage.
- Inspect the transmission for leaks or damage.
- Ensure the drive control cables are properly connected and functioning.
- Verify the blade brake is disengaged.
Quick Answer: A Husqvarna self-propelled mower not working often stems from a broken or worn drive belt, a faulty transmission, or a disconnected drive control cable. Checking these components is the first step towards restoring the self-propel function.
Husqvarna Self-Propelled Mower Not Working? Your Ultimate Troubleshooting & Repair Guide
Understanding Your Husqvarna’s Self-Propel System:
To effectively diagnose and resolve issues with a Husqvarna self-propelled mower, it is beneficial to first understand the fundamental mechanics of its drive system.
This foundational knowledge helps in pinpointing where a malfunction might occur, as each component plays a specific and interconnected role in propelling the mower.
The self-propel mechanism operates on a straightforward principle: the engine’s power is transferred through a series of components to the wheels, enabling the mower to move forward without manual pushing.
This power flow typically begins with the engine powering a drive belt, which in turn drives a transmission.
The transmission then engages the wheel assembly, translating the engine’s rotational energy into forward motion. A disruption at any point in this chain can lead to a loss of drive.
Several key components are integral to this system, each with a distinct function:
The V-belt:
This is a crucial link, responsible for transferring power directly from the engine crankshaft to the transmission and various drive pulleys.
Its integrity and tension are paramount for efficient power transfer.
The Drive Pulley:
Connected to the engine crankshaft, the drive pulley receives power from the V-belt. When engaged, it then transmits this power to the transmission, initiating the drive process for the wheels.
The Drive Cable (or Traction Control Cable):
This cable acts as the operator’s direct control over the self-propel feature.
Running from the handle lever to the transmission, it engages or disengages the drive system.
Proper tension in this cable is essential for responsive and consistent engagement.
The Transmission:
Often considered the heart of the drive system, the transmission is a gearbox that converts the rotational power from the drive belt into the appropriate motion for the wheels.
Its internal mechanisms are complex and critical for smooth operation.
The Wheel Assembly:
This includes the wheels themselves, which often feature internal gears (sometimes called pinion gears) that directly engage with the transmission’s drive gear.
The condition of these gears is vital for proper traction and movement.
Friction Ring (for snow blowers):
While this article primarily focuses on lawn mowers, it is worth noting that for Husqvarna snow blowers, a friction ring (also known as a friction wheel) plays a similar role.
This rubber outer layer grips and turns the drive plate, which is crucial for the snow blower’s wheel engagement.
Diagnosing Drive Loss: Symptoms and Initial Checks
When a Husqvarna self-propelled mower ceases to function as expected, recognizing the specific symptoms can significantly narrow down the potential causes.
A systematic approach to diagnosis, starting with the simplest checks, can often resolve the issue quickly and prevent unnecessary, complex repairs.
Common Symptoms of Drive Loss
Operators typically observe one or more distinct signs when their mower’s self-propel system is failing:
Slowing Down or Dragging:
The mower may feel noticeably heavier than usual, requiring more effort to push, or its forward speed might decrease significantly even when the engine is running at full power.
This often indicates a partial loss of drive or increased resistance within the system.
Inconsistent Movement:
Instead of a smooth, continuous motion, the mower might move erratically, surging forward briefly before slowing or stopping, then resuming movement.
This can be a sign of intermittent engagement or slipping components.
Complete Stoppage:
In more severe cases, the engine may run perfectly, but the mower will not move forward or backward at all, despite the self-propel lever being engaged.
This points to a complete failure in the power transfer to the wheels.
Lack of Forward or Reverse Motion:
This symptom is a direct indication that the drive system is not engaging the wheels effectively, preventing any movement in the intended direction.
Initial Checks Before Deeper Troubleshooting
Before delving into more intricate mechanical inspections, performing a few quick, initial checks can often identify and resolve the problem.
These steps are designed to address the most common and easily fixable issues:
Is the Drive Engaged?
The first step is to confirm that the self-propel lever or bail on the handle is fully engaged.
Sometimes, the lever may not be pulled back completely, or a slightly loose drive cable could prevent the full engagement of the self-propel feature.
Ensuring proper engagement is a simple yet crucial starting point.
Any Obvious Obstructions?
A common and often overlooked cause of drive loss is debris buildup.
Operators should quickly inspect the drive wheel area for any large accumulations of grass clippings, mud, leaves, or other foreign objects that could be jamming the wheels or transmission components.
This buildup can reduce traction or physically impede the movement of parts. Clearing such obstructions is a straightforward fix that can immediately restore functionality.
These initial checks serve as a valuable diagnostic filter. By systematically eliminating the simplest and most common causes, operators can avoid unnecessary disassembly and focus their efforts on more complex issues only if these initial steps do not resolve the problem.
This symptom-based prioritization ensures an efficient troubleshooting process, moving from the most accessible solutions to those requiring more detailed investigation.
Common Causes & DIY Troubleshooting Steps: Getting Your Mower Moving Again
Once initial checks have been performed, a deeper dive into common mechanical issues can help identify why a Husqvarna self-propelled mower is not working.
Many of these problems can be addressed with basic tools and a systematic approach.
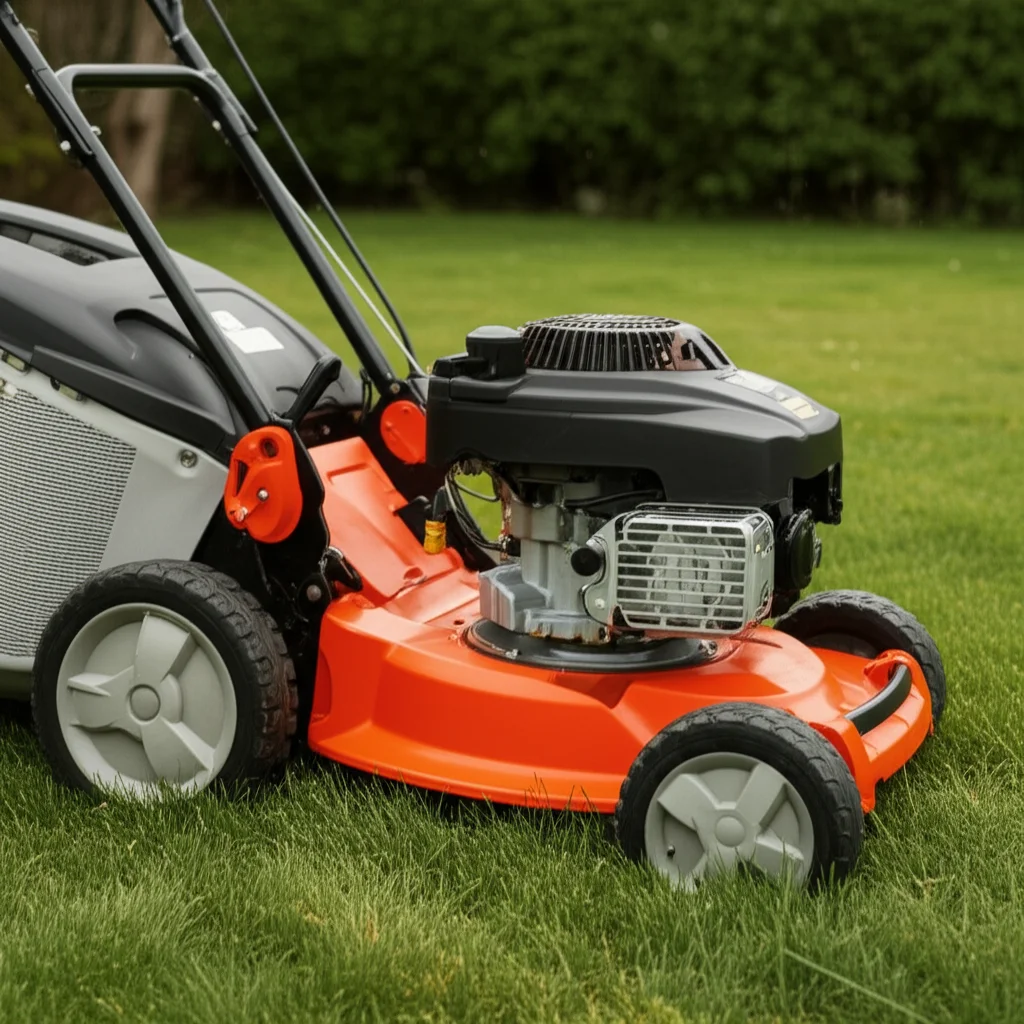
A. The Drive Belt: The Power Link
Problem Description:
The drive belt is a critical component, acting as the primary conduit for power from the engine to the transmission and subsequently to the wheels.
Its condition directly impacts the mower’s ability to self-propel.
Symptoms:
A mower with a compromised drive belt may exhibit symptoms such as slipping, a noticeable lack of power, or a complete absence of wheel movement.
The operator might also perceive the mower as dragging or slowing down significantly on flat ground, indicating inefficient power transfer.
Causes:
The V-belt can fail due to wear, such as fraying, cracks, or stretching. It can also come off its pulleys or become loose.
Prolonged operation with a loose belt can even lead to long-term engine damage due to increased strain.
The consistent occurrence of “worn, broken, stretched, or frayed” belts across various models points to material degradation over time as a fundamental cause of self-propel failure.
This is not merely accidental damage but a natural consequence of operational stress, highlighting the importance of regular inspection as part of preventative maintenance.
Solutions:
Reinstalling the Belt:
If the belt has merely slipped off its pulleys, carefully re-route it back into position. This simple fix can often restore functionality immediately.
Adjusting Tension:
Over time, the drive control system can become loose, resulting in decreased speed. Many Husqvarna models feature a turnbuckle located on the underside of the drive control housing that can be adjusted to increase tension on the drive cable and, consequently, the belt.
Replacement:
If the belt is visibly worn, broken, or stretched beyond effective use, replacement is necessary.
The general steps for replacement involve first disconnecting the spark plug for safety, then removing the mower blade to access the belt.
The drive cover and belt keeper may also need to be removed. The old belt is then slipped off the gearcase and engine pulleys, and a new, factory-approved belt is installed, ensuring proper routing and tension before reassembling all components.
Using a factory-approved belt is recommended to ensure proper fit and longevity.
B. The Drive Cable: Your Control Connection
Problem Description:
The drive cable, also known as the traction control cable, is the direct link between the operator’s control lever on the handle and the mower’s transmission.
Its proper function is essential for engaging and disengaging the self-propel feature.
Symptoms:
Issues with the drive cable can manifest as inconsistent speed, a complete failure of the self-propel mechanism to engage, a stiff or unresponsive control lever, or a sudden loss of function, particularly after the mower handles have been folded for storage.
Causes:
The control cable can become kinked, broken, or have loose connections at either end. Cracked plastic components associated with the cable mechanism can also indicate a problem.
The observation that cables can kink after handles are folded suggests a common user mistake or a design vulnerability where the cable is susceptible to damage during routine handling or storage.
This highlights the importance of proper mower handling and storage techniques to prevent such issues.
Solutions:
Lubrication:
If the cable does not move freely but appears otherwise intact, applying a small amount of penetrating oil, such as WD40, into the end of the cable can often restore smooth operation.
This helps to free up any sticking points within the cable housing.
Adjustment:
Similar to the drive belt, the drive control system’s responsiveness can diminish over time due to cable stretch or loosening.
Many models allow for adjustment via a turnbuckle located on the underside of the drive control housing to increase tension.
Some Husqvarna models also feature an adjustable nut near the handle. Turning this nut clockwise can accelerate the drive, while counter-clockwise turns can decelerate it.
The aim is to achieve a comfortable squeeze distance to the handlebar for optimal control.
Replacement:
If lubrication and adjustment prove ineffective, or if the cable is visibly broken or severely kinked (especially if the issue arose after folding the handles), replacement is the necessary course of action.
C. Debris Buildup: The Hidden Obstruction
Problem Description:
Accumulated debris can be a surprisingly common and easily overlooked cause of self-propel failure.
Grass clippings, mud, and leaves can jam moving parts, preventing the drive system from functioning correctly.
Symptoms:
Debris buildup typically leads to reduced traction, the wheels jamming, or the mower dragging and slowing down significantly.
The mower might feel sluggish or simply stop moving.
Causes:
Accumulation of grass cuttings, mud, leaves, or other foreign material inside the dust covers, around the pinion gears, and the drive wheel gear teeth.
This phenomenon, where environmental factors directly impede mechanical function, highlights the importance of the operating environment as a significant variable in mower performance and longevity.
Solutions:
The solution is straightforward: clean out the debris. This often involves removing the hubcaps, locknuts, and washers to take the wheels off the mower.
Once the wheels are removed, any trash or grass cuttings from inside the dust cover, around the pinion, and from the drive wheel gear teeth can be cleaned out.
In many cases, simply removing accumulated grass from around the transmission gears can restore the self-drive mechanism to full operation.
This reinforces the importance of post-use cleaning as a critical preventative maintenance step, not just for aesthetics but for maintaining functional integrity.
D. The Drive Pulley: Engaging the System
Problem Description:
The drive pulley plays a vital role in transmitting power from the V-belt to the transmission. If this component is compromised, the entire self-propel system will fail to engage the wheels.
Symptoms:
The primary symptom of a defective drive pulley is the inability of the transmission to engage the wheel assembly, meaning the mower’s wheels will not turn despite the engine running.
Causes:
The drive pulley, which connects to the engine crankshaft, can become worn or damaged.
Its failure can prevent the entire self-propel system from engaging, even if the belt and transmission appear to be in good condition.
Solutions:
If the drive pulley is found to be defective or worn out, it must be replaced. This repair typically requires removing the mower blade to gain access to the belt and the pulley itself.
Given its critical intermediary role, after checking the drive belt, the drive pulley should be the next logical point of inspection in the troubleshooting process.
E. Wheel Assembly & Gears: Traction and Movement
Problem Description:
The wheel assembly, particularly its internal gears, is directly responsible for converting the transmission’s power into actual movement.
Wear or damage to these components can lead to a loss of drive.
Symptoms:
Problems with the wheel assembly or its gears typically manifest as the wheels not turning, slipping, or exhibiting excessive wobble.
A noticeable lack of grip, especially on slightly uneven or damp terrain, can also indicate an issue with the drive wheels.
Causes:
- Gear Wear: Worn gear teeth, both on the internal wheel gears and the pinion gears that mesh with them. These gears, often made of plastic, are susceptible to wear over time.
- Retaining Hardware: Displaced or missing retaining clips and washers that secure the wheel components. Loose hardware can lead to improper engagement.
- Wheel Bearings: Worn-out wheel bearings can cause excessive wobble in the wheels and affect the smooth transfer of power, leading to inefficient movement.
Solutions:
Cleaning:
As with other drive components, debris can accumulate around the wheel gears.
Remove hubcaps, locknuts, and washers to take the wheels off, then clean out any trash or grass cuttings from inside the dust cover, pinion, and drive wheel gear teeth.
Replacement of Worn Wheels/Gears:
If the internal gears of the wheel assembly are worn out, or if the wheel itself is cracked or damaged, the entire wheel assembly may need replacement.
The steps for wheel replacement generally involve propping up the mower, removing the single nut securing the wheel, pulling off the old wheel, sliding the new wheel into place while ensuring the gears align, and then securing it with the nut.
A critical point to remember is not to lubricate the plastic gears. Adding lubricant will attract dirt and grit, which will quickly wear down these plastic components, counterintuitively causing more damage.
This highlights a specific material limitation that dictates a counter-intuitive maintenance practice.
Replacement of Wheel Bearings:
If worn bearings are causing wheel wobble or affecting movement, they can be replaced.
This typically involves removing the wheel and gently hammering the new bearing into place, ensuring it is seated correctly.
Wheel and bearing replacement are often considered relatively easy DIY tasks, sometimes taking as little as 15 minutes, making them highly accessible repairs for homeowners.
Common Self-Propel Issues & DIY Solutions
| Component | Symptoms | Causes | DIY Fixes |
|---|---|---|---|
| Drive Belt | Slipping, lack of power, no wheel movement, mower dragging/slowing | Fraying, cracks, stretching, off pulleys, loose tension | Reinstall, adjust tension (turnbuckle), replace if worn/broken |
| Drive Cable | Inconsistent speed, no engagement, stiff lever, stopped after folding handles | Kinks, breaks, loose connections, cracked plastic | Lubricate with oil (WD40), adjust tension (nut/turnbuckle), replace if damaged/ineffective |
| Debris Buildup | Reduced traction, wheels jamming, mower dragging/slowing | Grass clippings, mud, leaves in drive wheel area, dust covers, pinion, gear teeth | Clean out thoroughly by removing wheels and covers |
| Drive Pulley | Transmission unable to engage wheel assembly, wheels don’t turn | Wear or damage to pulley | Replace if defective |
| Wheel Assembly/Gears | Wheels not turning, slipping, excessive wobble, lack of grip | Worn gear teeth (pinion/wheel gears), displaced/missing clips/washers | Clean, replace worn wheel assembly/gears. Do NOT lubricate plastic gears |
| Wheel Bearings | Excessive wheel wobble, affecting movement | Worn-out bearings | Replace worn bearings |
Advanced Troubleshooting & Component Replacement: When Basic Fixes Aren’t Enough
Sometimes, the issue extends beyond simple adjustments or cleaning, requiring more advanced diagnostics and component replacement.
These repairs can be more complex and may involve significant cost or specialized skills.
A. The Transmission: The Core Drive Unit
Problem Description:
The transmission is the central gearbox responsible for translating the power from the drive belt into the rotational motion of the wheels. Its failure is often a definitive cause of self-propelled issues.
Symptoms:
The most conclusive symptom of a defective transmission is when the transmission pulley spins freely, but the mower wheels do not turn.
This indicates an internal mechanical failure within the transmission unit itself, where power is received but not effectively transferred to the drive wheels.
Causes:
Internal mechanical defect within the transmission unit. While some instances of drive loss might be attributed to grass clogs around the transmission gears that can be cleaned, true internal mechanical failure necessitates replacing the entire unit.
This recurring statement that the transmission is “not repairable” and often leads to considering a “new mower” highlights a significant economic consideration.
For older or lower-value mowers, the cost of a new transmission (for example, a Husqvarna 589599201 front drive transmission assembly can cost around $93.13) might make purchasing a new mower a more financially sensible decision, especially when factoring in the complexity of the repair.
Solutions:
A critical point to understand is that Husqvarna transmissions are generally not repairable in the traditional sense; they typically require a full replacement if defective.
Replacing a transmission is a more involved repair, often considered to be of medium difficulty, akin to changing a half-axle, and is generally not recommended for entry-level DIYers.
It can demand specialized tools and the willingness to contend with potentially corroded bolts or components.
General Steps for AWD Front Drive Unit Transmission Replacement (e.g., model 589599201):
- Safety First: Disconnect the spark plug wire or remove the battery.
- Access Components: Remove both front wheels, their plastic guards, and the drive gears located underneath. Note the presence of a spring clip and a key pin that must not be lost.
- Remove Covers: Detach the plastic cover located under the deck (secured by two screws at the front edge and one on each side behind the wheels) and the plastic cover on top of the deck (secured by two screws underneath).
- Release Belt: Carefully release the drive belt from the pulley.
- Remove Wheel Assembly: Remove the front-right wheel assembly. The two bolts securing it under the deck may be heavily corroded and might require cutting off, with new studs welded in place. It is often prudent to replace the wheel bearing at this stage as well.
- Remove Transmission Screw: Locate and remove the transmission mounting screw, typically found behind the left wheel.
- Pulley Removal: Attempt to remove the pulley. If it is stuck, the axle can sometimes be driven from the left side to the right to release it from the left axle bearing, allowing the pulley to be lowered through the deck opening.
- Install New Transmission: Carefully slip the new transmission through the left bearing, raise it into its correct position, and secure it by replacing the mounting screw.
- Reassembly: Reinstall the right wheel assembly, then the pulley, belt keeper, and belt. Finally, reinstall the drive gears, ensuring the key pins and spring clips are correctly seated, followed by the plastic guards, washers, wheels, and plastic deck covers. It is important to reuse the original pulley and belt retention pin from the old transmission.
When performing such repairs, it is critical to consider using genuine OEM parts. Manufacturers like Repair Clinic emphasize that using genuine OEM shaft and transmission parts helps maintain the manufacturer’s warranty.
This suggests that opting for non-OEM components, even if seemingly compatible, could potentially void an existing warranty.
B. All-Wheel Drive (AWD) Specific Considerations (e.g., HU800AWD, LC221AWD)
Problem Description:
All-Wheel Drive (AWD) Husqvarna mowers offer enhanced traction, but their increased complexity can introduce unique troubleshooting challenges, particularly concerning the front drive system.
Symptoms:
If the front wheels are not receiving power, or the mower is stuck in drive.
Causes:
For AWD models like the HU800AWD, if the front wheels are not receiving power, the problem often lies with a broken spline or shaft pin within the front transmission.
This issue is described as “very difficult to fix” by some users, with the shaft pin enduring “stupid levels of abuse” and the nylon splines being prone to eventual breakage.
The inherent design of these components, which must withstand significant operational stresses, appears to be a chronic failure point rather than simply a matter of wear and tear.
A peculiar challenge also arises when replacing an old, stretched AWD belt with a new one.
The new belt, being shorter and un-stretched, can be too tight, causing the mower to be stuck in drive or preventing the gears from slipping easily.
Solutions:
Consequently, some experienced users have advised considering a new mower altogether when faced with this specific problem due to its difficulty and potential for recurrence.
This perspective, often shared within user communities, provides a practical assessment of the repair’s feasibility and long-term viability, supplementing official manuals that may not detail such chronic issues.
For the tight belt issue, operators might need to significantly loosen the belt adjustment, even if the manual’s instructions seem to point in the opposite direction.
On many mowers, a tensioner spring attached to a bolt allows for more substantial adjustments, which may be necessary in this scenario.
It is also worth noting that new belts often stretch considerably during the first few hours of use, which can help alleviate initial tightness.
This community-derived knowledge is invaluable for navigating issues not explicitly covered in standard repair guides.
C. Other Less Common Issues
Carburetor Problems
Problem Description:
Although not a direct component of the self-propel mechanism, a clogged or improperly jetted carburetor can severely impact engine performance.
Symptoms:
If the engine loses power, stalls, or surges, it may not generate sufficient power to drive the self-propel system effectively.
Causes:
Clogged or improperly jetted carburetor.
Solutions:
In such cases, cleaning or replacing the carburetor might be necessary to restore full engine power and, consequently, the self-propel function.
D.Friction Ring Issues (Snow Blowers)
Problem Description:
For Husqvarna snow blowers, a distinct component known as the friction ring (or friction wheel) is crucial for wheel engagement.
Symptoms:
If this rubber layer is worn, wet, or greasy, it can slip on the drive plate, preventing the snowblower wheels from turning.
Causes:
Worn, wet, or greasy friction ring.
Solutions:
The solution typically involves cleaning the friction ring and drive plate, or replacing the friction ring if it is worn out.
It is important to differentiate this from lawn mower drive systems, as friction rings are specific to snow blower mechanisms.
Transmission & AWD System Troubleshooting
| Component | Symptoms | Causes | Solution/Consideration |
|---|---|---|---|
| Transmission (General) | Transmission pulley spins, but wheels do not turn | Internal mechanical defect; generally not repairable | Replacement often required. Consider cost-benefit vs. new mower. Use OEM parts to preserve warranty. |
| AWD Front Drive (Spline/Pin) | Front wheels not getting power, mower stuck in drive (especially HU800AWD) | Broken spline or shaft pin in front transmission. Shaft pin takes “stupid levels of abuse,” nylon splines break. New AWD belts may be too tight. | Very difficult to fix; consider new mower. New AWD belts may be too tight and require loosening adjustment. |
Preventative Maintenance: Extending Your Mower’s Lifespan
Proactive maintenance is the most effective strategy for preventing self-propel issues and extending the overall lifespan of a Husqvarna mower.
By consistently performing routine care, operators can significantly reduce the likelihood of unexpected breakdowns and costly repairs, shifting the focus from reactive fixes to sustained performance.
A. Regular Cleaning Practices
Debris buildup is a leading cause of drive system malfunctions. Therefore, consistent cleaning is paramount.
After Each Use:
Ideally, the mower should be cleaned after every use. This involves removing caked-on grass clippings, drying any moisture, and wiping down the blades with mineral oil.
This diligent practice prevents the accumulation of debris, which can lead to corrosion and damage to critical components, including the drive system.
Underside of Deck:
When cleaning the underside of the mower deck, always tip the mower backward towards the handles, never to its side.
This crucial step prevents oil and fuel from seeping into unintended areas of the engine, which can cause significant damage.
If the mower is equipped with a garden hose fitting, it can be used to flush the deck while the mower runs, allowing the water to clean the underside effectively.
For models without this feature, manually removing the bulk of grass and dirt with gloved hands is necessary.
Regular cleaning of the deck directly prevents drive system clogs and helps maintain optimal cutting performance.
Drive System Components:
Beyond the deck, it is important to regularly clean out grass cuttings and trash from the drive wheel area, including inside the dust covers, around the pinion, and from the drive wheel gear teeth.
This targeted cleaning ensures that the intricate components of the drive system remain free of obstructions that could impede their movement or cause premature wear.
B. Lubrication Schedule
Proper lubrication reduces friction and wear on moving parts, thereby extending their operational life. However, it requires careful attention to detail, as incorrect application can cause more harm than good.
Identifying Zerk Fittings:
For riding mowers, two zerk fittings are typically found near each front wheel, serving the wheel bearing and spindle.
Additional zerks may be present on deck spindles. For walk-behind mowers, operators should consult their owner’s manual for specific lubrication points, as locations can vary by model.
Proper Greasing Techniques:
When using a grease gun, pump until old grease is visibly forced out around the ends of the sleeve being greased, or until any rubber boot seals begin to swell, indicating they are filling with grease.
A critical warning is to exercise extreme caution and avoid getting grease on any belts, as this will cause them to slip, leading to a loss of drive.
This highlights a specific material interaction where a common maintenance practice can be detrimental.
If a zerk fitting is difficult to grease, a small flat-tip screwdriver can be used to gently push the ball inside, helping to loosen it, or the zerk fitting itself can be replaced.
Lubricating Control Cables:
Applying penetrating oil to control cables is recommended to ensure their smooth operation and prevent stiffness or sticking.
This maintains the responsiveness of the self-propel lever.
C. Seasonal Checks and Replacements
Comprehensive annual maintenance ensures that all critical systems of the mower are functioning optimally, preventing major breakdowns.
Engine Maintenance:
Engine oil should be replaced annually or after every 25 hours of operation, whichever comes first.
In dusty or dirty operating conditions, more frequent oil changes may be necessary. The spark plug should be checked and replaced annually or every 100 hours.
Similarly, the air filter requires regular cleaning or replacement, with increased frequency if the mower operates in dusty environments.
Fuel System:
The fuel hose should be regularly inspected for cracks or other damage. It is also beneficial to empty and clean the fuel tank periodically.
Always use fresh, clean, unleaded gasoline with a minimum of 87 octane, and avoid mixing oil with gasoline. Fuel purchased should ideally be used within 30 days to ensure freshness.
General Inspection:
A general inspection should include tightening all nuts, screws, and fasteners at frequent intervals to ensure the equipment is in safe working condition.
Checking for any fuel or oil leaks is also a vital part of this routine.
Belt and Cable Inspection:
As part of seasonal maintenance, a thorough inspection of drive belts and cables for wear, proper tension, and free movement is essential.
This ensures that these critical components are in optimal condition for the upcoming mowing season.
Husqvarna Self-Propelled Mower Annual Maintenance Checklist
| Maintenance Interval | Task | Key Details/Notes |
|---|---|---|
| After Each Use | General inspection (nuts, screws, cables, leaks) | Ensure all fasteners are tight, no visible cable damage or leaks. |
| Check oil level | Ensure adequate lubrication for engine. | |
| Clean product (deck, drive system) | Tip mower backward (not side) to prevent oil/fuel seepage. Use hose fitting if available, otherwise manually clean debris from deck, drive wheel area, dust covers, pinion, and gear teeth. | |
| Check cutting equipment & cover | Inspect blades for sharpness/damage, ensure cover is secure. | |
| Monthly Maintenance | Check muffler | Inspect for blockages or damage. |
| Clean air filter | More often in dusty conditions. Use compressed air, not liquid. | |
| Clean cooling fins on cylinder | Ensures proper engine cooling. | |
| Seasonally/Annually | Replace engine oil | Every 25 hours or annually; twice per season if heavy use/high temps. |
| Check/replace spark plug | Annually or every 100 hours. | |
| Replace air filter | As part of seasonal overhaul. | |
| Check fuel system (hoses, tank) | Inspect for cracks, empty and clean tank. Use fresh, unleaded gasoline. | |
| Lubricate drive system components | Grease zerk fittings (wheel bearings, spindles). Apply penetrating oil to control cables. Avoid grease on belts and plastic gears. | |
| Check drive belt and cable tension | Adjust as needed. |
FAQ: Husqvarna Self-Propelled Mower Troubleshooting
Q: My Husqvarna mower self-propel works intermittently. What could be causing this? A: Intermittent self-propel can indicate a loose drive belt, a partially disconnected drive control cable, or a failing transmission. Carefully inspect each component for any signs of looseness or damage.
Q: How often should I replace the drive belt on my Husqvarna mower? A: The drive belt should be replaced when it shows signs of wear, such as cracks, fraying, or stretching. Generally, replacing the belt every 2-3 seasons is a good practice, depending on usage.
Q: Can I use a universal drive belt on my Husqvarna mower? A: It’s generally not recommended to use a universal drive belt. Using the correct belt specified for your mower model ensures proper fit and performance.
Q: What should I do if I suspect a transmission problem? A: If you suspect a transmission problem, it’s best to consult a qualified repair technician. Transmission repairs can be complex and require specialized tools and knowledge.
Q: Is it normal for the self-propel to feel sluggish? A: A slightly sluggish self-propel can be normal, especially when mowing tall or thick grass. However, if the self-propel feels significantly sluggish or struggles to move the mower, it could indicate a problem with the drive belt, transmission, or wheels.
Conclusion: Getting Back to Mowing with Confidence
A Husqvarna self-propelled mower that isn’t working can be frustrating, but with a little troubleshooting, you can often identify and resolve the issue yourself. Remember to prioritize safety by disconnecting the spark plug wire before performing any repairs. By checking the drive belt, transmission, drive control cables, and blade brake, you’ll be well on your way to getting your mower moving again. Regular preventative maintenance will help keep your self-propel system functioning optimally for years to come. If you’re still experiencing problems, don’t hesitate to consult a qualified repair technician. Now, go enjoy a beautifully mowed lawn!
- Husqvarna mower
- self propelled mower
- lawn mower repair
- mower troubleshooting