· Troubleshooting · 19 min read
Husqvarna Self Propelled Lawn Mower Problems
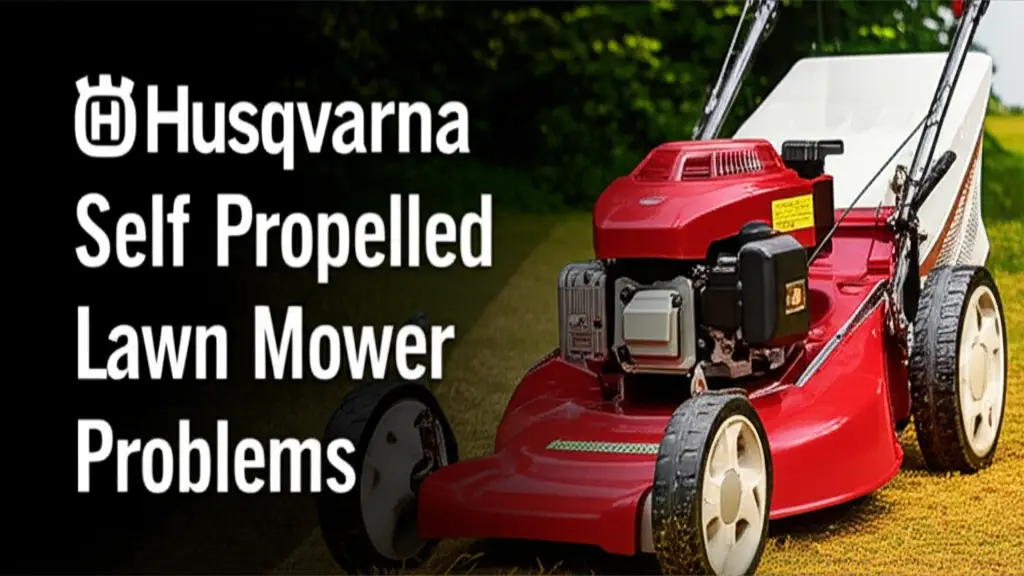
Fix Your Husqvarna Self-Propelled Mower Problems
There is nothing quite as frustrating as a lawn mower that will not cooperate, especially when it is supposed to be doing the heavy lifting.
If a Husqvarna self-propelled lawn mower is acting up, the owner is not alone. Many homeowners encounter common issues that can hinder their mower’s performance, turning a simple chore into a strenuous workout.
This comprehensive guide will walk through the most common Husqvarna self-propelled lawn mower problems, offering clear troubleshooting steps and actionable solutions.
From drive system failures to engine hiccups, this report will assist in diagnosing the issue, understanding its root cause, and getting the mower back to effortlessly gliding across the lawn.
The aim is to empower users to tackle these challenges with confidence and potentially save time and money on professional repairs.
Key Takeaways:
- Regular maintenance is crucial for preventing most Husqvarna self-propelled mower problems and extending equipment lifespan.
- Always disconnect the spark plug before inspecting or repairing any part of the mower to ensure safety.
- Many self-propel issues originate from worn belts, faulty cables, or debris buildup, which are often manageable with DIY repairs.
- Transmission problems typically necessitate replacement, which represents a more significant and costly repair.
Understanding Husqvarna Self-Propelled System
A self-propelled lawn mower is designed to reduce the physical effort required for mowing by driving its own wheels.
This mechanism relies on a sophisticated interplay of several key components. At its core, the engine crankshaft connects to a self-propel drive pulley.
A V-belt then loops around this drive pulley and another pulley located on a gearbox or transmission.
When the operator engages the drive arm, often referred to as a bail arm, a control cable and spring assembly apply tension to this second pulley. This tension allows the belt to effectively turn the gears within the transmission, which in turn rotates the axle and propels the mower’s wheels forward.
This intricate system ensures that the mower moves independently, maintaining a consistent speed even as it encounters varying grass conditions, with the engine automatically adjusting torque as needed. Releasing the drive lever disengages this system, stopping the self-propel function.
Husqvarna self-propelled mowers typically feature either front-wheel drive (FWD) or rear-wheel drive (RWD) systems.
While both provide assistance, RWD systems are generally preferred for their superior traction, particularly when navigating inclines or uneven terrain.
Furthermore, RWD models tend to experience less excessive tire wear compared to their FWD counterparts, which can contribute to a more consistent drive system performance over time.
Understanding these fundamental operational principles is essential for effective troubleshooting, as it provides a framework for identifying where a malfunction might occur within the drive chain.
The longevity and consistent performance of a self-propelled mower are significantly influenced by consistent maintenance practices.
The average life expectancy for a walk-behind lawn mower is eight to ten years, a duration largely achievable through regular tune-ups, periodic oil changes, and the use of appropriate lawn mower oil.
Neglecting these routine tasks can lead to a range of issues, from excessive fuel consumption to a noticeable reduction in engine power.
Common Husqvarna Self-Propelled Lawn Mower Problems & Solutions
Addressing issues with a Husqvarna self-propelled lawn mower requires a systematic approach, always commencing with safety.
It is paramount to disconnect the spark plug wire before undertaking any inspection or repair. This simple yet critical step prevents accidental engine starting, mitigating the risk of serious injury during maintenance.
Drive Belt Issues: When the Power Doesn’t Reach the Wheels
Problem:
The mower loses its drive, resulting in inconsistent movement, slowing down, or a complete loss of propulsion despite the engine running.
Description/Symptoms:
A visibly loose belt or a drive system that feels weak can often indicate a compromised V-belt. The mower may move inconsistently or stop entirely.
Cause:
The V-belt, which transfers power from the engine to the drive pulleys, becomes worn, frayed, cracked, stretched, or completely broken.
Accumulation of grass clippings, mud, leaves, and other yard waste around the belt and pulleys can interfere with the belt’s tension, causing it to slip or jam.
Some Husqvarna models, like the LC221A, have an exposed belt and pulley system, making them particularly susceptible to debris buildup and premature belt wear.
Solution/Repair Steps:
- Inspect the V-belt: Visually examine the entire length of the V-belt for any signs of damage, such as fraying, cracks, or excessive stretching.
- Check for debris: Thoroughly inspect the area around the belt and pulleys for accumulated grass clippings, mud, or leaves. Remove any obstructions, paying close attention to areas where debris might interfere with belt tensioning mechanisms. Cleaning this area, especially underneath components like the brake stop, can significantly improve belt tension and restore proper function.
- Replace the V-belt (if damaged or excessively worn):
- Ensure the spark plug wire is disconnected for safety.
- Loosen the belt tensioner or use a pry bar to create slack in the belt.
- Carefully remove the old V-belt from the pulleys, making a note of its original routing path.
- Inspect the pulleys and their bearings for any damage or excessive wear, cleaning off any remaining debris.
- Slip the new V-belt onto the pulleys, ensuring it follows the exact routing of the old belt.
- Adjust the tensioner or apply pressure to achieve the proper tautness for the new belt.
- Verify that the belt is correctly centered on the pulleys and is not twisted or binding.
- Reconnect the spark plug wire and test the mower’s operation to confirm smooth engagement of the self-propel system.
Traction Control Cable Troubles: Loss of Engagement
Problem:
The self-propel feature fails to engage, engages inconsistently, or the mower is difficult to pull backward.
Description/Symptoms:
The mower may be hard to pull backward due to the drive mechanism sticking. A loose or unresponsive control lever can also indicate a problem with the cable’s tension or integrity.
Cause:
The traction control cable (self-propel cable), which extends from the mower’s handle to the transmission, can become broken, kinked, misadjusted, or seized due to a lack of lubrication.
Folding mower handles for storage or transport can inadvertently damage the cable. Improper tension also prevents the cable from effectively engaging the drive pulley.
Solution/Repair Steps:
- Inspect the cable: Visually examine the entire length of the traction control cable for any signs of kinks, fraying, or other damage. Check both connection points for secure attachment.
- Lubricate: If the cable appears intact but does not move freely, apply a small amount of light oil (e.g., WD40) to the cable’s ends and along its exposed sections to improve movement.
- Adjust tension: Locate the cable adjusters and manipulate them to achieve the proper tension. The cable requires sufficient tautness to engage the drive pulley effectively. The ideal tension allows for some movement in the cable when the bail is squeezed but prevents the hand from tiring quickly by requiring excessive force to fully engage the drive.
- Replace the cable (if damaged, kinked, or lubrication is ineffective):
- Ensure the spark plug wire is disconnected.
- Shift the traction control lever to release any tension on the old cable.
- Use pliers or a screwdriver to loosen any cable clamps and detach the old cable from its connection points, carefully noting its routing path.
- Thread the new traction control cable along the same path, guiding it through any pulleys and adjusters.
- Attach the end of the new cable to the control lever, securing it with a retaining clip or pin.
- Position and tighten the cable clamps over the new cable housing to hold it firmly in place.
- Use the adjusters to achieve the proper tension in the new traction control cable, ensuring smooth engagement of the self-propel system.
- Reconnect the spark plug wire and test the mower’s operation.
Transmission Failures: The Heart of the Drive System
Problem:
The mower loses drive, slows down, moves inconsistently, or stops completely even though the engine continues to run.
Description/Symptoms:
A common indicator of a defective transmission is when the transmission pulley spins while the mower is running, but the wheels themselves do not turn.
In some cases, a failing transmission may manifest as the mower struggling on inclines or feeling like it is slipping, indicating a loss of effective power transfer.
Cause:
The transmission itself is defective. Hydrostatic transmissions, commonly found in lower-end consumer models, are particularly susceptible to issues related to overheating.
When these transmissions are overworked, or if their cooling fins become packed with old grass and dirt, they can overheat, causing the transmission fluid to deteriorate prematurely and leading to early failure. Debris buildup around the transmission components can also interfere with its function.
Solution/Repair Steps:
Observe Transmission Pulley:
With the engine running (and all safety precautions, including spark plug disconnection, in place), carefully observe the transmission.
If the transmission pulley is spinning, but the mower’s wheels are not turning, this strongly indicates a defective transmission.
Check for Debris:
Before assuming a full transmission failure, inspect the area around the transmission for any accumulated grass clippings or debris.
Sometimes, simply cleaning out clogged gears can restore the self-propel function. For hydrostatic transmissions, ensure cooling fins are clean to prevent overheating and fluid deterioration.
Transmission Replacement (if defective):
- Ensure the spark plug wire is disconnected.
- If applicable, drain any old oil from the transmission case.
- Detach all drive linkages, clevis pins, washers, and cotter pins securing the shift linkage or rods to the transmission.
- Loosen cable clamps and disconnect any shift selector and speed control cables from the transmission.
- Support the transmission and remove its mounting bolts. Carefully separate the old transmission from the mower deck.
- Position the replacement transmission, aligning it with the mounting holes. Insert and hand-tighten the mounting bolts.
- Reconnect all shift selector and speed control cables to the appropriate fittings on the new transmission.
- Refill the transmission with new oil to the proper level, as indicated by the dipstick or fill plug.
- Reconnect the spark plug wire once the new transmission is fully installed.
- Start the mower engine and test the gear engagement and speeds to verify proper operation of the self-propel system.
Drive Pulley & Wheel Assembly Issues: Mechanical Roadblocks
Problem:
The self-propelled mower does not move effectively, or the wheels lock up.
Description/Symptoms:
The mower may not move at all, or move inconsistently. A distinct symptom often reported is the wheels locking up, particularly when attempting to pull the mower backward.
A weak self-propelled system or loose/wobbly wheels can also be indicators.
Cause:
The drive pulley, connected to the engine crankshaft, can become damaged or broken, interrupting the power transfer.
The wheel assembly itself contains gears that can become excessively worn, preventing the transmission from driving the wheels.
Accumulation of grass clippings, mud, or leaves around the drive wheels can reduce traction or jam moving parts.
Friction where the axles are supported by bushings, often due to corrosion or a lack of lubrication, can contribute to a weak self-propelled system.
Worn ball bearings within the wheel assembly can cause loose or wobbly wheels.
Solution/Repair Steps:
Inspect Drive Pulley:
Carefully examine the drive pulley for any visible signs of wear, cracks, or damage.
If the pulley is defective, it will need to be replaced.
- Replacement involves disconnecting the spark plug, removing the drive belt and the old pulley, sliding the new pulley onto the drive shaft, securing it with the retaining bolt, reattaching the belt, and then testing the system.
Inspect Wheel Assembly: Check the gears within the wheel assembly for signs of wear or damage.
If the gears are worn, the entire wheel assembly typically requires replacement.
- Replacement involves safely raising and supporting the mower, removing the axle hardware, detaching the old wheel, installing the new assembly, securing it, and finally testing the mower’s movement.
Clean Debris:
Thoroughly remove any accumulated grass clippings, mud, or other debris from around the drive wheels, axles, and any exposed drive mechanisms.
This is particularly important if the wheels are locking up or the drive feels sluggish.
Lubricate Axles:
Apply a light lubricant (e.g., silicone spray) to the points where the axles meet their bushings.
This can reduce friction, improve drive performance, and prevent premature wear on other components.
Check Ball Bearings:
If the wheels exhibit excessive wobbling, inspect the ball bearings within the wheel assembly.
Worn bearings will need to be replaced to restore stability and smooth operation.
Beyond Self-Propel: Other Common Husqvarna Mower Problems
While the self-propel function is a primary concern for many users, Husqvarna mowers can experience a range of other common issues that affect their overall operation.
Understanding these broader problems is essential for comprehensive maintenance and troubleshooting.
Engine Won’t Start or Stalls: Fuel, Spark, and Air
Problem:
The engine fails to start, starts then stalls, loses power, sputters, or fades.
Description/Symptoms:
The mower may be difficult to start, or it might start briefly and then die. It could also run with reduced power or an inconsistent engine sound.
Cause:
Spark Plug:
A worn, damaged, or heavily fouled spark plug can prevent proper ignition.
Fuel System:
A clogged carburetor, often caused by old or stale fuel, can restrict fuel flow. A blocked fuel filter or a faulty fuel pump can also impede fuel delivery.
For specific models like the Husqvarna LC221A, the main jet hole in the carburetor may be inherently too small due to EPA regulations, leading to insufficient fuel flow.
Air Supply:
A blocked or dirty air filter will restrict necessary airflow to the engine, causing it to run poorly or not at all.
Mechanical Issues:
A sheared flywheel key, often from the blade hitting a hard object, can throw off engine timing.
Low engine compression due to incorrect valve settings, damaged valves or springs, or worn cylinder bores and piston rings can severely impact engine performance.
Choke Plate:
The choke plate not closing completely can prevent proper cold starting.
Hydraulic Lock:
The combustion chamber can become clogged with excessive oil or fuel, physically preventing the starter rope from moving.
Solution/Repair Steps:
Check Spark Plug:
Remove the spark plug, inspect it for carbon buildup or damage, clean it, and check the gap.
Replace it if it is old or compromised. A spark plug tester can confirm if a strong spark is present when the engine is cranking.
Inspect Fuel System:
- Drain any old or incorrect fuel from the tank and refill with fresh, high-quality fuel.
- Replace the fuel filter if it appears blocked.
- Clean the carburetor with a carburetor cleaner; if cleaning is ineffective, a rebuild or replacement may be necessary. For LC221A models, consider the specific issue of the main jet size and the potential for careful enlargement if standard cleaning does not resolve power issues.
- Check the fuel pump for proper operation if the mower has one.
Inspect Air Filter:
Remove and inspect the air filter. Clean or replace it if it is dirty or blocked.
Check Flywheel Key:
If the mower abruptly stopped after hitting an object, remove the flywheel and inspect the key for breakage. Replace it if it is sheared.
Check Choke Plate:
Ensure the choke plate closes completely when the choke is engaged. Adjust it if it does not.
Test for Hydraulic Lock:
If the starter rope is stuck, remove the spark plug and attempt to pull the cord. If it moves freely and oil or fuel spits out of the spark plug hole, a hydraulic lock is the issue.
Safety Switch Malfunctions: Unexpected Shutdowns
Problem:
The mower fails to start, cuts in and out randomly during operation, or, conversely, the engine continues to spark after the handle lever is released.
Description/Symptoms:
On walk-behind mowers, the engine may not stop when the bail bar is released. On riding mowers, the engine might cut out if the operator leaves the seat, or it may cut in and out randomly during use.
Cause:
Safety switches are designed to prevent accidents by stopping the engine under specific conditions.
A faulty bail bar (engine safety switch) on walk-behind mowers, or a defective seat pressure switch on riding mowers, can cause these issues.
Other safety switches for blade engagement or parking brake status can also malfunction. A partially failing switch can lead to intermittent problems.
Solution/Repair Steps:
Identify the type of safety switch:
Determine if the mower uses a bail bar (engine safety switch) for walk-behind models or a seat pressure switch for riding mowers.
Test the switch:
- Bail Bar: Disconnect the kill wire from the ignition coil and check for engine spark. If spark is present, the safety switch is likely the problem. If the engine continues to spark after the handle lever is released, the switch is also faulty.
- Seat Switch (Riding Mowers): If the mower cuts in and out randomly, a failing seat switch could be the cause. Testing often requires a multimeter to check for continuity or, cautiously, a temporary bypass for diagnostic purposes (such actions carry significant safety implications and should only be performed cautiously for testing, never for permanent operation).
Replace the safety switch:
If the safety switch is determined to be defective, it must be replaced with a manufacturer-approved part.
The replacement process typically involves disconnecting the spark plug, removing any relevant covers or components, detaching the old switch, installing the new one, and then carefully reassembling the mower.
Preventative Maintenance for Your Husqvarna Mower
Regular maintenance is the cornerstone of ensuring a reliable and long-lasting lawn mower.
Adhering to a comprehensive maintenance schedule not only prevents common problems but also significantly extends the lifespan of the equipment.
Furthermore, preventative maintenance tasks can serve as an initial diagnostic checklist when new symptoms arise, allowing for quick and often inexpensive resolutions before issues escalate.
For instance, if a mower begins to consume excessive fuel or experience low power, the first course of action should be to inspect common service items, which are part of routine maintenance.
General Maintenance Schedule:
Change the Oil:
It is recommended to change the engine oil annually or after a specified number of operating hours, as detailed in the owner’s manual.
This involves placing a container beneath the mower’s drain plug, removing the plug to drain the old oil, replacing the plug, and then refilling the reservoir with fresh oil of the appropriate grade and amount.
Proper oil levels and type are crucial to prevent engine damage.
Grease Moving Parts:
Apply a light-duty lubricant to contact surfaces such as wheel bearings, cables, and height adjusters.
Additionally, spraying silicone under the mower deck can help prevent rust and reduce grass clippings from sticking.
Care should be taken to avoid lubricating surfaces that come into contact with the drive belt during operation.
Replace Spark Plugs:
Spark plugs are inexpensive and play a vital role in engine ignition. It is advisable to replace them annually, as a compromised spark plug can lead to starting difficulties or inefficient combustion.
Clean/Replace Air Filter:
The air filter should be regularly inspected and cleaned or replaced, especially in dry or dusty mowing conditions.
A blocked air filter restricts airflow, which can lead to excessive fuel consumption and reduced engine power.
Sponge filters can often be cleaned with warm, soapy water and reused, while cardboard filters typically require replacement.
Sharpen/Replace Blades:
To maintain optimal cutting performance and reduce strain on the engine, mower blades should be professionally sharpened at least once a year.
Any blades that are bent, damaged, or show significant wear should be replaced, as dull blades force the engine to work harder to achieve the desired cut.
Check/Replace Belts:
For self-propelled units, it is essential to regularly remove any grass buildup from under the deck and around the drive belt.
Inspect the belts for signs of heavy wear or cracking, and replace them immediately if any damage is observed.
Check Fuel Filter:
The fuel filter should be inspected and replaced if it appears blocked, as a clogged filter can restrict fuel flow and cause engine performance issues.
Check Oil Level:
Before each use, verify that the oil level is sufficient for proper operation.
Clean Cutting Deck:
Ensure that no debris, such as grass clippings, twigs, or stones, is caught under the cutting deck, as this can create drag on the motor and affect cutting performance.
Address Fuel Contamination:
If fuel is suspected to be contaminated or stale, it should be drained and replaced with fresh fuel.
A significant cause of carburetor issues is leaving fuel in the mower for extended periods, leading to sticky residues.
To prevent this, consider turning off the fuel valve and allowing the carburetor to run out of gas before storing the mower for prolonged periods.
This proactive fuel management can prevent numerous fuel-related engine problems.
Model-Specific Considerations: HU800AWD & LC221A
While many Husqvarna self-propelled mower problems are common across various models, certain models, like the LC221A and HU800AWD, exhibit specific quirks or recurring issues that owners should be particularly aware of.
These model-specific characteristics often stem from unique design choices or operational nuances.
Husqvarna LC221A Specific Issues
Problem: Frequent self-propel issues and increased maintenance demands.
Description/Symptoms:
The all-wheel-drive (AWD) system may fail, or the wheels may lock up, especially when attempting to pull the mower backward.
Users have reported grinding noises and belts burning up.
Cause:
A significant design characteristic of the Husqvarna LC221A is its exposed drive system. Unlike many other mowers with protective shrouds, the LC221A’s belt and pulley system is notably uncovered.
This allows grass clippings, mud, and other debris to easily accumulate within the drive system, jamming pulleys and causing premature wear or cutting of the drive belt.
Solution/Repair Steps:
Owners must engage in frequent and thorough cleaning of the exposed drive area, which may necessitate partial disassembly to effectively remove packed grass.
Problem: Power loss, engine stalling, surging, or inability to efficiently run the all-wheel-drive system.
Description/Symptoms: The engine may struggle to maintain power, especially when the AWD system is engaged, or it may stall and surge.
Cause: Users have observed that the main jet hole in the carburetor may be too small, a consequence potentially linked to EPA regulations on emissions. This restricted fuel flow can lead to the described power issues.
Solution/Repair Steps: While conventional carburetor cleaning is a standard troubleshooting step, this particular issue often requires a more advanced, community-derived solution: carefully enlarging the main jet hole with a micro drill bit. It is important to note that such a modification is advanced and may void warranties or affect emissions compliance, thus requiring careful consideration by the owner.
Husqvarna HU800AWD Specific Issues
Problem: All-Wheel Drive (AWD) system engagement issues.
Description/Symptoms:
The AWD system may fail to engage all four wheels, or the mower may not move perfectly straight when the drive is engaged.
Cause:
This can stem from general drive system issues (e.g., worn belts, faulty cables, transmission problems, or debris buildup) affecting the AWD components.
Solution/Repair Steps:
Apply general drive system troubleshooting steps, focusing on inspecting and addressing issues within the AWD components.
Problem: Excessive oil burning.
Description/Symptoms:
The engine may exhibit signs of “roasting the rings,” leading to noticeable oil consumption, especially when the engine is warm.
Cause:
The use of an incorrect or improperly fitted air filter can allow dirty air to bypass the filtration system and enter the engine.
This ingress of unfiltered air can lead to significant internal engine damage, such as damage to the piston rings.
Solution/Repair Steps:
Ensure that the correct, clean air filter is always installed. In cases where significant internal damage has already occurred due to prolonged exposure to dirty air, an engine rebuild may become necessary to restore proper function and prevent continued oil consumption.
Final Words
Tackling Husqvarna self-propelled lawn mower problems can seem daunting, but with the right knowledge and a methodical approach, many common issues are well within the grasp of a DIY enthusiast.
From replacing a worn V-belt to clearing stubborn debris, understanding a mower’s mechanics empowers individuals to keep it running smoothly. Remember, consistent preventative maintenance is the best defense against future breakdowns and can significantly extend the life of the equipment.
Always prioritize safety by disconnecting the spark plug before any work.
If a problem is encountered that is beyond one’s comfort level, do not hesitate to consult the Husqvarna owner’s manual or a certified service dealer for expert assistance.
A well-maintained lawn mower ensures a well-maintained lawn.
- Husqvarna mower
- self propelled mower
- lawn mower repair

